Fuel to Go Homemade Protein Bars
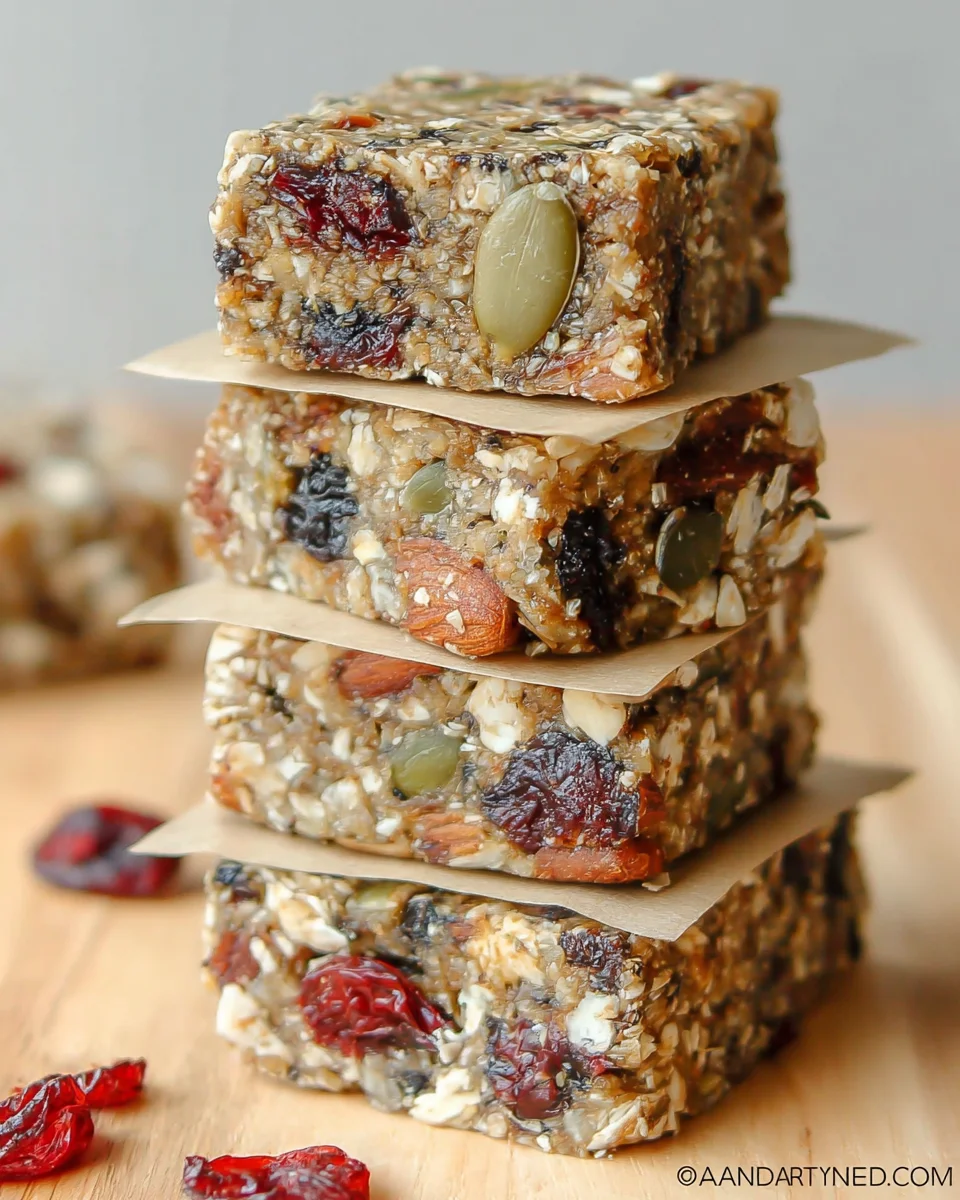
Fuel to Go Homemade Protein Bars are a delicious and healthy snack option, perfect for fueling your day. Packed with nutritious seeds and dried fruits, these bars are not only easy to make but also versatile enough for any occasion—whether you’re heading to the gym, going on a hike, or just need a quick pick-me-up.
Why You’ll Love This Recipe
- Nutrient-Packed: These bars feature a blend of seeds and dried fruits that provide essential nutrients and energy.
- Quick and Easy: With minimal prep time, you can whip these bars up in just 20 minutes.
- Customizable: Feel free to swap in your favorite nuts or dried fruits for a personal touch.
- Great for Meal Prep: Make a batch ahead of time for convenient snacks throughout the week.
- Kid-Friendly: Even picky eaters will enjoy these tasty bars, making them perfect for lunchboxes.
Tools and Preparation
To make Fuel to Go Homemade Protein Bars, you’ll need some essential tools to ensure everything runs smoothly.
Grab This Chef Knife Now - Almost Gone!
- Stays Razor-Sharp: Ice-hardened blade keeps its edge longer than ordinary knives
- Superior Grip Control: Unique finger hole design gives you perfect balance and safety
- Built to Last a Lifetime: Premium stainless steel blade with elegant beech wood handle
Customer Reviews ★★★★★
Essential Tools and Equipment
- Mixing bowl
- Saucepan
- Spoon or spatula
- 8×8 baking pan
- Refrigerator
Importance of Each Tool
- Mixing bowl: A large mixing bowl is crucial for combining all your dry ingredients thoroughly.
- Saucepan: Used for melting the peanut butter and other sticky ingredients together without burning them.
Ingredients
Dry Ingredients
- 1 cup Rice Krispies
- 1/2 cup dried blueberries
- 1/2 cup dried cranberries
- 1/2 cup raisins
- 1/2 cup unsweetened coconut
- 1/4 cup hemp seeds
- 1/4 cup chia seeds
- 1/4 cup sunflower seeds
- 1/4 cup pumpkin seeds
Wet Ingredients
- 1/2 cup peanut butter
- 1/4 cup honey
- 1/4 cup brown sugar (packed)
- 1/4 cup corn syrup
- 4 teaspoons butter
How to Make Fuel to Go Homemade Protein Bars
Step 1: Combine Dry Ingredients
In a large bowl, combine the Rice Krispies, dried blueberries, cranberries, raisins, unsweetened coconut, hemp seeds, chia seeds, sunflower seeds, and pumpkin seeds. Mix well until all ingredients are evenly distributed.
Step 2: Melt Wet Ingredients
In a saucepan over low heat, stir together the peanut butter, butter, honey, brown sugar, and corn syrup. Heat gently while stirring continually until everything is melted and well combined. Be careful not to let it boil.
Step 3: Mix Together
Pour the melted peanut butter mixture over the dry ingredients. Stir until everything is well coated and mixed together.
Step 4: Press into Pan
Transfer the mixture into an 8×8 lightly buttered pan. Press down firmly with a spatula or your hands to ensure it holds together well.
Step 5: Chill Until Set
Refrigerate the mixture for about an hour or until it is set. Once firm, cut into bars and enjoy!
These Fuel to Go Homemade Protein Bars are not only easy to prepare but also provide a wholesome snack anytime you need an energy boost!
How to Serve Fuel to Go Homemade Protein Bars
Fuel to Go Homemade Protein Bars are a versatile snack that can be enjoyed in various ways. Whether you’re on-the-go or relaxing at home, these protein bars make for a nutritious treat to keep you energized.
On-the-Go Snack
- Perfect for busy mornings, grab a bar as you head out the door.
- Ideal for post-workout recovery, providing quick energy and protein.
Lunchbox Addition
- Slip a bar into your child’s lunchbox for a healthy treat.
- Pair with fruit or yogurt for a balanced meal.
Afternoon Pick-Me-Up
- Enjoy with a cup of tea or coffee during your afternoon break.
- The sweet and nutty flavors complement drinks perfectly.
Camping or Hiking Companion
- Pack them for outdoor adventures, providing energy without excess weight.
- No refrigeration needed, making them great travel snacks.
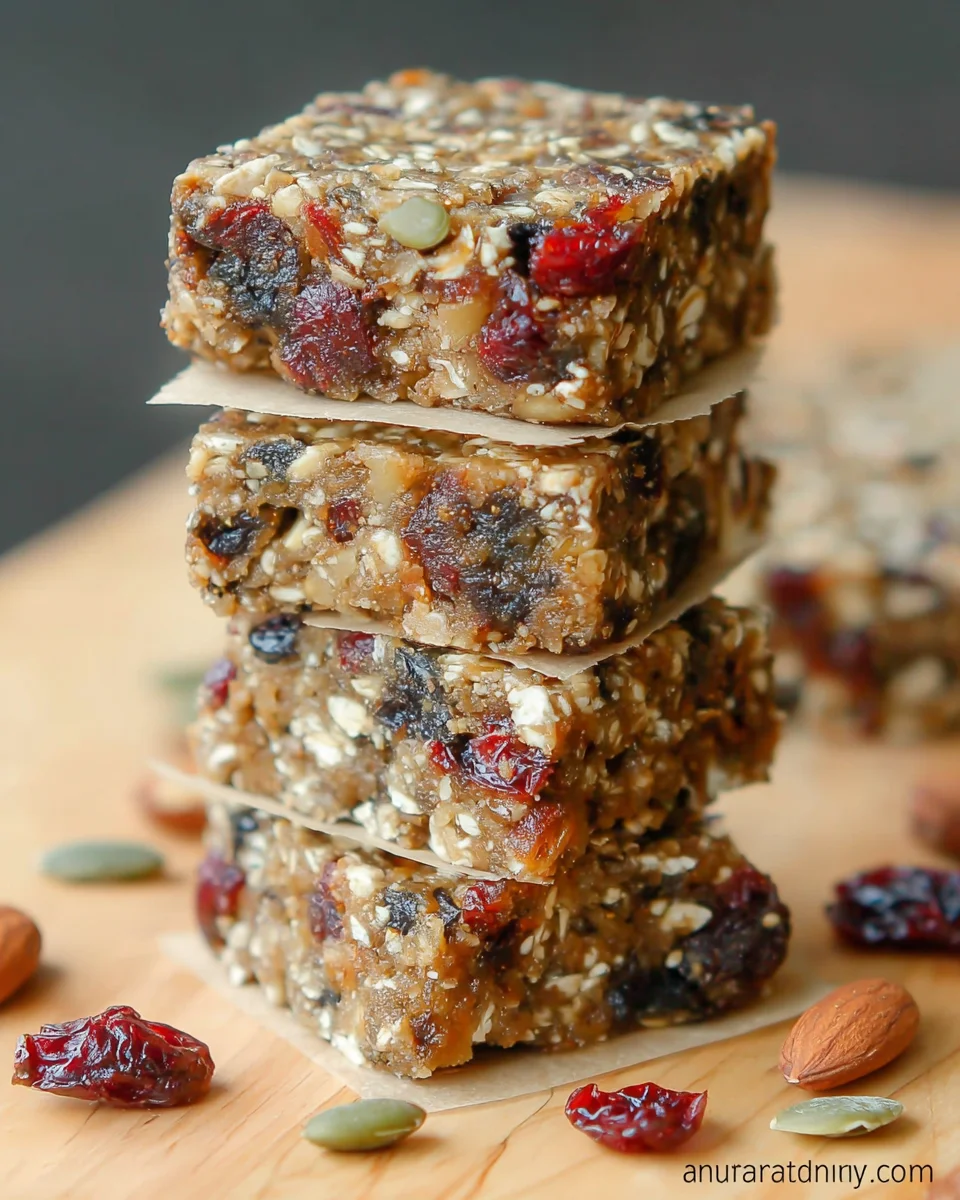
How to Perfect Fuel to Go Homemade Protein Bars
To get the best results from your homemade protein bars, consider these tips.
- Use fresh ingredients: Fresh seeds and dried fruits enhance flavor and nutrition.
- Adjust sweetness: Feel free to modify the honey and brown sugar according to your taste preferences.
- Customize mix-ins: Experiment with different nuts or seeds based on what you have on hand.
- Press firmly: Ensure ingredients are tightly packed in the pan for better texture and easier cutting.
- Let cool completely: Proper cooling ensures they set well before slicing into bars.
- Store properly: Keep them in an airtight container to maintain freshness longer.
Best Side Dishes for Fuel to Go Homemade Protein Bars
While Fuel to Go Homemade Protein Bars are delicious on their own, pairing them with complementary side dishes can enhance your snack experience. Here are some great options:
-
Fresh Fruit
Sliced apples or bananas offer natural sweetness and fiber alongside the protein bar. -
Greek Yogurt
A dollop of Greek yogurt adds creaminess and extra protein, making it a filling snack. -
Trail Mix
Combine nuts and dried fruits for a crunchy side that pairs well with the chewy texture of the bars. -
Smoothie
Blend your favorite fruits with yogurt or milk for a refreshing drink that complements the protein bars. -
Nut Butter Dip
Serve with almond or peanut butter for an extra boost of flavor and healthy fats. -
Veggie Sticks
Crunchy carrots or celery sticks provide a refreshing contrast, perfect for balancing out sweetness. -
Popcorn
Air-popped popcorn makes a light side option that’s both fun and satisfying alongside your bars.
Common Mistakes to Avoid
When making Fuel to Go Homemade Protein Bars, there are common pitfalls that can affect the outcome. Here are some mistakes to watch out for:
- Skipping the measurements: Not measuring ingredients accurately can lead to a poor texture. Use measuring cups and spoons for precision.
- Overheating the mixture: If you boil the peanut butter mixture, it will harden too much. Always heat on low and stir continuously until melted.
- Not pressing firmly: Failing to press the mixture into the pan can result in crumbly bars. Use a spatula or your hands to compress it well.
- Ignoring chill time: Cutting the bars too soon may cause them to fall apart. Allow them to refrigerate fully before slicing.
- Using stale ingredients: Old nuts or seeds can ruin flavor. Always check the freshness of your ingredients before use.
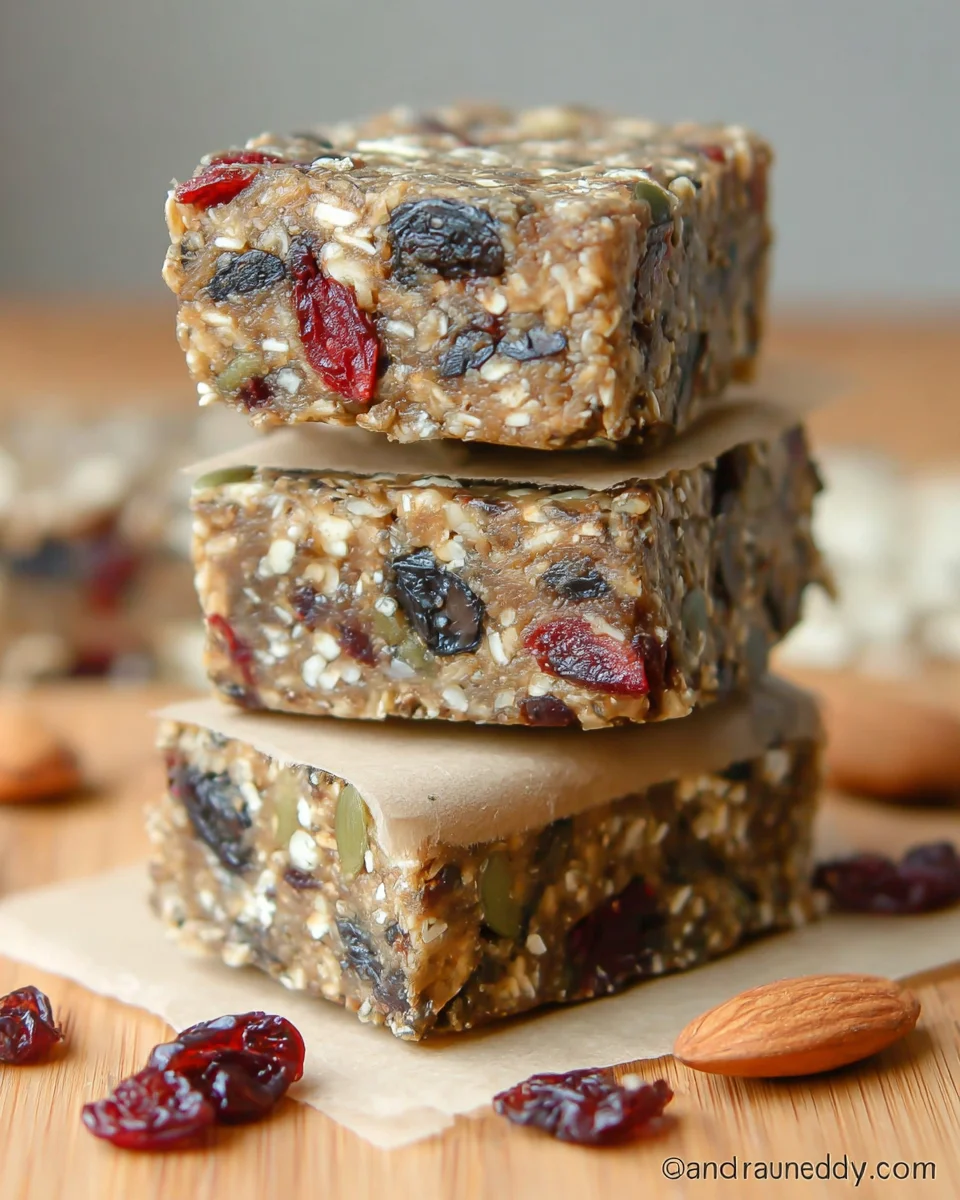
Storage & Reheating Instructions
Refrigerator Storage
- Store bars in an airtight container.
- Keep them in the refrigerator for up to one week.
Freezing Fuel to Go Homemade Protein Bars
- Wrap individual bars in plastic wrap or foil.
- Place wrapped bars in a freezer-safe container; they can be frozen for up to three months.
Reheating Fuel to Go Homemade Protein Bars
- Oven: Preheat oven to 350°F (175°C) and warm bars for about 5-10 minutes.
- Microwave: Heat on medium power for 15-20 seconds until warm.
- Stovetop: Place a non-stick skillet over low heat and warm bars for 2-3 minutes on each side.
Frequently Asked Questions
Here are some common questions about Fuel to Go Homemade Protein Bars that you might find helpful:
How do I customize Fuel to Go Homemade Protein Bars?
You can easily customize these bars by adding different nuts, seeds, or dried fruits based on your taste preferences.
Can I make these protein bars vegan?
Yes! Simply replace honey with maple syrup and ensure that all other ingredients are vegan-friendly.
How long do Fuel to Go Homemade Protein Bars last?
When stored properly in the refrigerator, these bars last up to one week. They can also be frozen for up to three months.
Are Fuel to Go Homemade Protein Bars healthy?
Absolutely! These bars include nutritious seeds and fruits, making them a great source of energy and healthy fats.
Final Thoughts
Fuel to Go Homemade Protein Bars are not only delicious but also versatile. You can tweak the recipe by adding your favorite ingredients or adjusting sweetness levels. Give this recipe a try and enjoy a healthy snack that fuels your day!
Fuel to Go Homemade Protein Bars
- Total Time: 20 minutes
- Yield: Approximately 12 servings 1x
Description
Fuel to Go Homemade Protein Bars are the ultimate healthy snack, offering a delicious way to fuel your day. These bars are packed with nutritious seeds and dried fruits, making them perfect for on-the-go energy boosts, post-workout recovery, or a quick afternoon pick-me-up. With just 20 minutes of prep time and a few simple ingredients, you can create customizable protein bars that cater to your taste preferences. Enjoy these nutrient-dense snacks in lunchboxes or as a satisfying treat during outdoor adventures.
Ingredients
- 1 cup Rice Krispies
- 1/2 cup dried blueberries
- 1/2 cup dried cranberries
- 1/2 cup raisins
- 1/2 cup unsweetened coconut
- 1/4 cup hemp seeds
- 1/4 cup chia seeds
- 1/4 cup sunflower seeds
- 1/4 cup pumpkin seeds
- 1/2 cup peanut butter
- 1/4 cup honey
- 1/4 cup brown sugar (packed)
- 1/4 cup corn syrup
- 4 teaspoons butter
Instructions
- Combine all dry ingredients in a large mixing bowl and mix well.
- In a saucepan over low heat, melt the peanut butter, butter, honey, brown sugar, and corn syrup together until well combined.
- Pour the melted mixture over the dry ingredients and stir until everything is evenly coated.
- Press the mixture into a lightly greased 8×8 baking pan firmly using a spatula or your hands.
- Refrigerate for about an hour until set, then cut into bars and enjoy!
- Prep Time: 10 minutes
- Cook Time: 10 minutes
- Category: Snack
- Method: No-bake
- Cuisine: American
Nutrition
- Serving Size: 1 bar (40g)
- Calories: 170
- Sugar: 9g
- Sodium: 50mg
- Fat: 7g
- Saturated Fat: 2g
- Unsaturated Fat: 5g
- Trans Fat: 0g
- Carbohydrates: 25g
- Fiber: 3g
- Protein: 5g
- Cholesterol: 0mg

