Red, White and Blue Dirt Cups
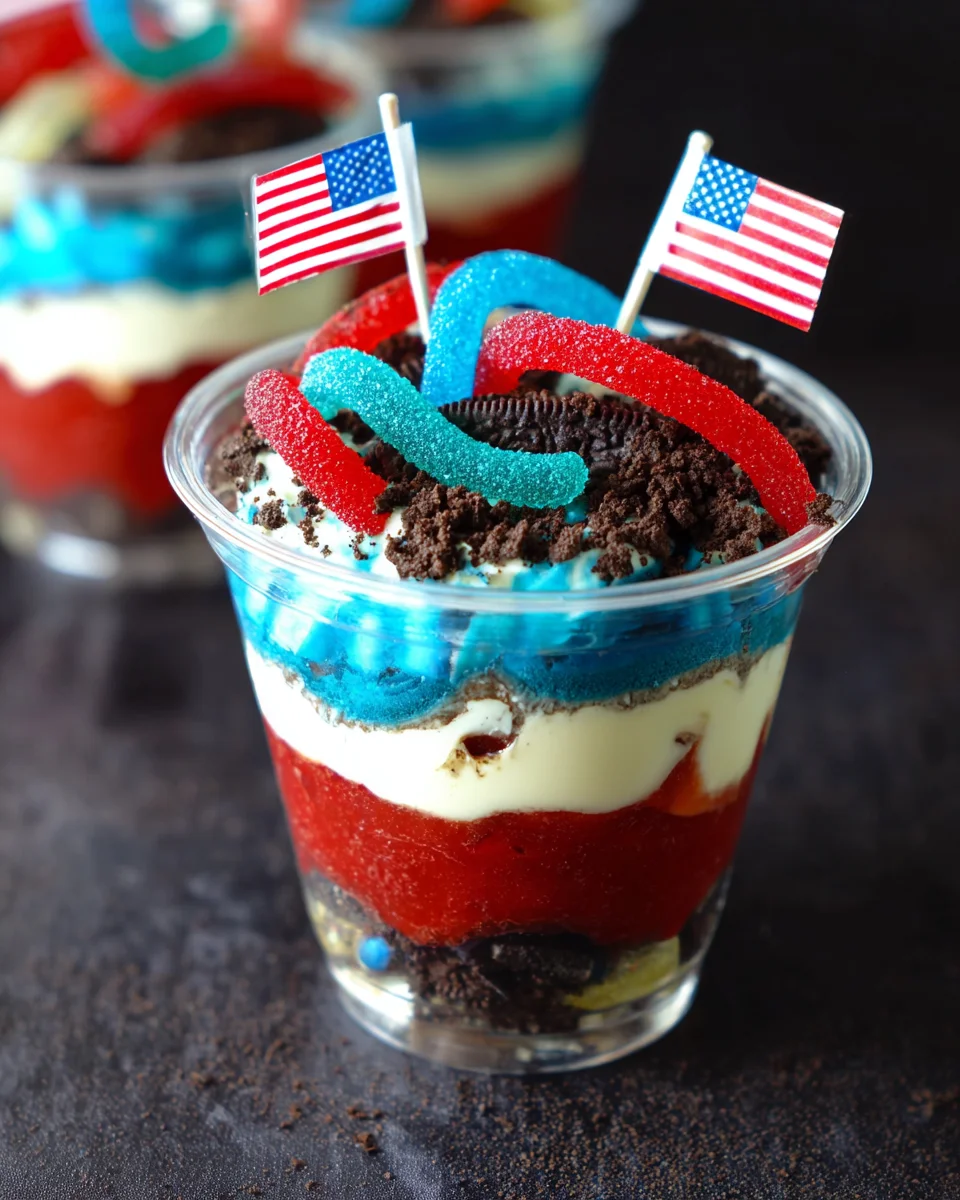
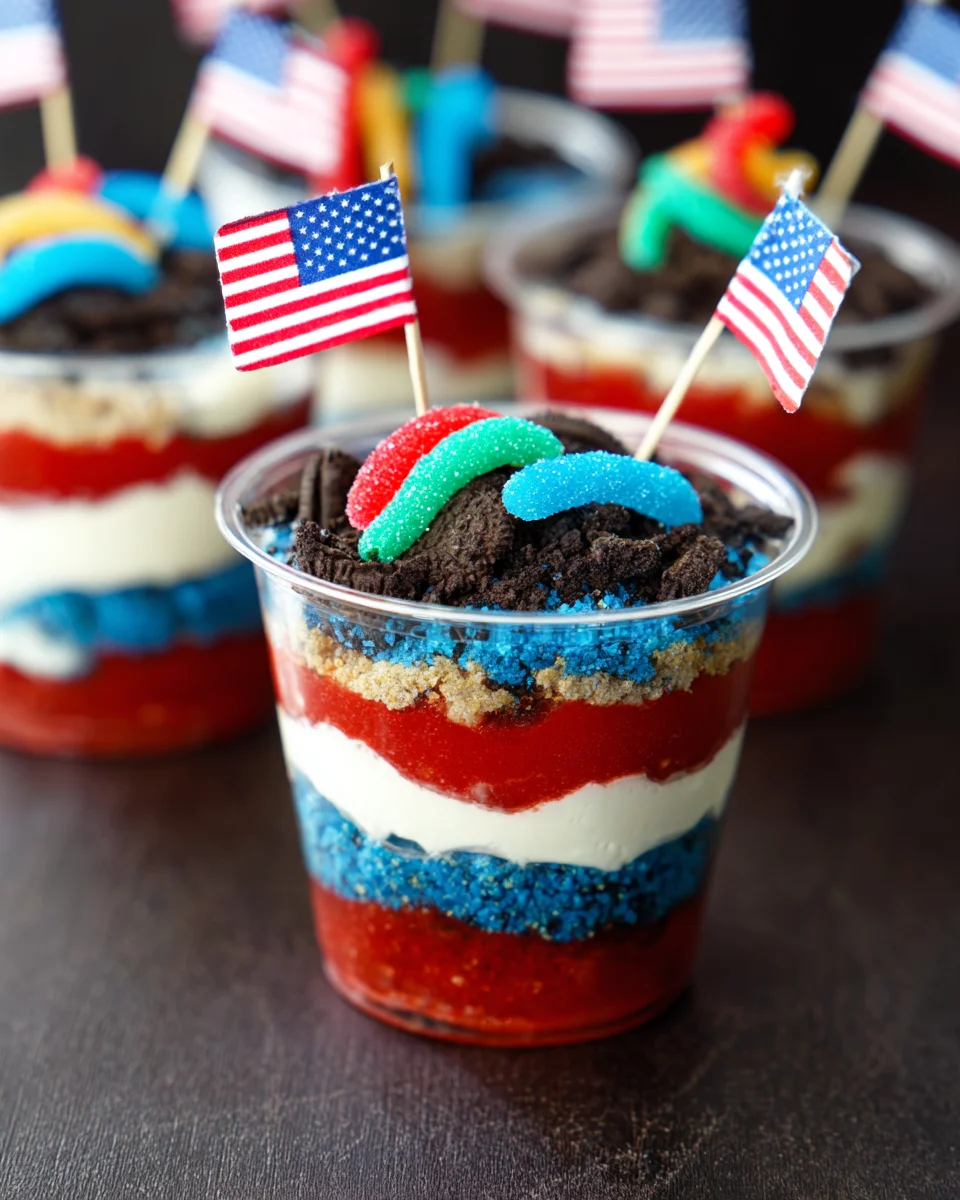
Red, White, and Blue Dirt Cups are the ultimate festive dessert for celebrating patriotic occasions like the 4th of July. These delightful layers of creamy pudding and crunchy Oreos come together to create a visually stunning treat that kids and adults will love. Easy to prepare and fun to eat, these dirt cups are perfect for parties, picnics, or any summer gathering. With their vibrant colors and delicious flavors, they stand out at any event.
Why You’ll Love This Recipe
- Easy to Prepare: This no-bake dessert requires minimal effort, making it perfect for busy cooks.
- Kid-Friendly Fun: Kids can help assemble these cups, making them a great family activity.
- Festive Presentation: The red, white, and blue layers create an eye-catching treat ideal for celebrations.
- Versatile Ingredients: Swap out Oreos or gummy worms for other favorites to suit your taste.
- Quick Assembly: With just 10 minutes of prep time, you can whip these up in no time!
Tools and Preparation
Before diving into the delightful layers of this dessert, gather your tools to make the process smooth and enjoyable. Having everything ready will ensure you can focus on creating these beautiful Red, White and Blue Dirt Cups.
Grab This Chef Knife Now - Almost Gone!
- Stays Razor-Sharp: Ice-hardened blade keeps its edge longer than ordinary knives
- Superior Grip Control: Unique finger hole design gives you perfect balance and safety
- Built to Last a Lifetime: Premium stainless steel blade with elegant beech wood handle
Customer Reviews ★★★★★
Essential Tools and Equipment
- Mixing bowls
- Whisk
- Measuring cups
- Clear plastic cups (9oz)
- Spoon or spatula
Importance of Each Tool
- Mixing bowls: Essential for combining ingredients smoothly without making a mess.
- Whisk: Helps achieve a creamy consistency in the pudding by incorporating air.
- Clear plastic cups: Perfect for showcasing the colorful layers of your dessert while being easy to serve.
Ingredients
Pudding Base
- Cheesecake Pudding Mix
- Milk
Layers
- Oreo Cookies, crushed
- Red & Blue Gel Food Coloring
Toppings
- Red & Blue Gummy Worms
- Flag Cupcake Toppers
Cups
- Clear Plastic Cups, 9oz
How to Make Red, White and Blue Dirt Cups
Step 1: Prepare the Pudding Mixture
- Place both boxes of cheesecake pudding mix in a large mixing bowl.
- Add the milk and whisk until the pudding has thickened.
Step 2: Color the Pudding
- Divide the pudding into two separate bowls:
- One bowl with 1 cup of pudding.
- Another bowl with 1 ½ cups of pudding.
- Add blue gel food coloring to the bowl with 1 cup of pudding and stir until evenly colored.
- Add red gel food coloring to the bowl with 1 ½ cups of pudding and stir until no streaks remain.
Step 3: Assemble the Cups
- Line up your clear plastic cups on a flat surface.
- In each cup, place 1 tablespoon of crushed Oreos at the bottom and spread evenly.
- Add 2 tablespoons of blue pudding on top of the Oreos, spreading it gently.
- Follow with another tablespoon of crushed Oreos and spread evenly again.
- Add 3 tablespoons of white pudding as the next layer; ensure it’s smooth.
- Then add 1 ½ tablespoons more white pudding on top.
- Next, layer on 4 tablespoons of red pudding as your final color layer.
- Top off with another 2 tablespoons of crushed Oreos for texture.
Step 4: Finish with Fun Toppings
- To complete each cup, place two gummy worms on top along with one flag cupcake topper for decoration.
Enjoy your deliciously festive Red, White and Blue Dirt Cups at your next gathering!
How to Serve Red, White and Blue Dirt Cups
Red, White and Blue Dirt Cups are a fun and festive dessert perfect for celebrations. Here are some creative ways to serve these delightful treats.
Individual Dessert Cups
- These cups make great individual servings, allowing everyone to enjoy their own festive treat without sharing.
Party Platter
- Arrange the cups on a colorful platter for a striking centerpiece at your next gathering. This adds a pop of color to your table!
Picnic Treats
- Pack these cups in your picnic basket. They are easy to transport and will surely impress your friends and family during outdoor events.
Themed Dessert Table
- Include these cups as part of a themed dessert table for patriotic holidays. Pair them with other red, white, and blue desserts for a cohesive look.
How to Perfect Red, White and Blue Dirt Cups
For an even better experience with your Red, White and Blue Dirt Cups, consider the following tips.
- Use Fresh Ingredients: Always check the expiration dates on your pudding mix and milk for the best flavor.
- Chill Before Serving: Refrigerate the cups for about an hour before serving. This enhances the texture and flavors.
- Layer Neatly: Use a spoon or spatula to create clean layers. This makes each cup visually appealing.
- Garnish Creatively: Experiment with different toppings like whipped cream or fresh berries to elevate presentation.
- Adjust Sweetness: If you prefer less sweetness, use less sugar in the pudding mix or choose sugar-free options.
- Make Ahead: Prepare the cups a few hours in advance. This saves time when you’re ready to serve.
Best Side Dishes for Red, White and Blue Dirt Cups
Pairing side dishes with Red, White and Blue Dirt Cups can enhance your meal experience. Here are some great suggestions.
- Grilled Corn Salad: A refreshing salad featuring sweet corn, chopped peppers, and lime dressing complements the sweetness of the dessert.
- Caprese Skewers: Fresh mozzarella, tomatoes, and basil drizzled with balsamic glaze add a savory touch that’s easy to eat.
- Watermelon Feta Salad: This combination of juicy watermelon and salty feta is light and refreshing for hot summer days.
- Berry Smoothie: A fruity smoothie using mixed berries offers a cool contrast to the rich dirt cups while keeping things fruity.
- Pasta Salad: A cold pasta salad with Italian dressing can balance out the sweetness of the dessert nicely.
- Veggie Tray: Serve assorted fresh vegetables with dip as a crunchy option that pairs well with sweet desserts.
- Cheese Board: An assortment of cheeses can provide savory bites between sweet layers from the dirt cups.
- Mini Hot Dogs: Bite-sized hot dogs are always a hit at gatherings and bring out that classic summer vibe alongside your dessert!
Common Mistakes to Avoid
When making Red, White and Blue Dirt Cups, it’s easy to overlook some details that can affect the final outcome. Here are some common mistakes to watch out for:
- Skipping the Whisking Step: Not whisking the pudding thoroughly can lead to a lumpy texture. Make sure to mix until completely smooth before layering.
- Ignoring Layer Thickness: If layers are uneven, they won’t look appealing. Use consistent measurements for each layer to ensure a beautiful presentation.
- Using Non-Clear Cups: Using opaque cups hides the beautiful layers of your dessert. Always opt for clear plastic cups to showcase those vibrant colors!
- Not Allowing for Chilling Time: These dirt cups benefit from chilling in the refrigerator. Skip this step, and you might miss out on a firmer texture.
- Forgetting Garnishes: Missing out on toppings like gummy worms and flag toppers can make your dessert less festive. Always finish with fun garnishes for a patriotic touch.
Storage & Reheating Instructions
Refrigerator Storage
- Store in airtight containers for up to 2 days.
- Cover cups with plastic wrap if left in their original containers.
Freezing Red, White and Blue Dirt Cups
- Freeze for up to 1 month in freezer-safe containers.
- Allow them to thaw in the refrigerator overnight before serving.
Reheating Red, White and Blue Dirt Cups
- Oven: Not recommended, as these desserts are best served cold.
- Microwave: Use only if you prefer a softer texture; heat in short bursts.
- Stovetop: Not applicable; recommend serving cold directly from the fridge.
Frequently Asked Questions
Here are some common questions regarding Red, White and Blue Dirt Cups:
How do I make Red, White and Blue Dirt Cups healthier?
You can substitute regular pudding with sugar-free options or use Greek yogurt for a lighter version while maintaining flavor.
Can I prepare Red, White and Blue Dirt Cups ahead of time?
Yes! These cups can be made a day in advance. Just keep them refrigerated until serving time.
What other toppings can I use for Red, White and Blue Dirt Cups?
Feel free to add fresh berries or whipped cream on top for extra flavor and decoration.
Are Red, White and Blue Dirt Cups suitable for gluten-free diets?
Yes! Just ensure you use gluten-free Oreo cookies or alternative cookies that fit your dietary needs.
Final Thoughts
Red, White and Blue Dirt Cups are not only visually stunning but also incredibly versatile. You can customize them with different colors or flavors according to your preferences. Perfect for celebrations like the 4th of July or any summer gathering, these delightful desserts will surely impress both kids and adults alike!
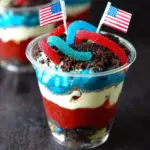
Red, White, and Blue Dirt Cups
- Total Time: 0 hours
- Yield: Makes approximately 6 servings
Description
Red, White, and Blue Dirt Cups are the perfect festive dessert to celebrate patriotic occasions like the 4th of July. With vibrant layers of creamy cheesecake pudding and crunchy Oreo crumbles, these no-bake treats are as delightful to eat as they are visually appealing. Simple enough for kids to help assemble, these cups bring a fun twist to summer gatherings, picnics, and parties. Topped with colorful gummy worms and festive decorations, they will surely be a hit with guests of all ages.
Ingredients
- Cheesecake pudding mix
- Milk
- Oreo cookies (crushed)
- Red & blue gel food coloring
- Gummy worms
- Clear plastic cups (9oz)
Instructions
- In a large mixing bowl, combine two boxes of cheesecake pudding mix with milk. Whisk until thickened.
- Divide the pudding into two bowls: color one blue and the other red using gel food coloring.
- Layer the cups: start with crushed Oreos at the bottom, followed by blue pudding, more Oreos, white pudding, and finish with red pudding.
- Top each cup with more crushed Oreos and garnish with gummy worms.
- Prep Time: 10 minutes
- Cook Time: None
- Category: Dessert
- Method: No-Bake
- Cuisine: American
Nutrition
- Serving Size: 1 cup (150g)
- Calories: 240
- Sugar: 18g
- Sodium: 280mg
- Fat: 10g
- Saturated Fat: 5g
- Unsaturated Fat: 3g
- Trans Fat: 0g
- Carbohydrates: 34g
- Fiber: 1g
- Protein: 3g
- Cholesterol: 15mg

